2010 February 26 / |j|d|a|v|i|s|@|c|a|r|l|e|t|o|n|.|e|d|u
Bopa
Bopa is a simple 2D graphics library for Python. It lets you draw a variety of geometric shapes and interact with them through keyboard and mouse. Bopa doesn't have many fancy features, but what it does it does quickly — it's built atop the OpenGL graphics system, which is typically implemented in hardware.
Bopa is closely related to the Bopagopa 3D graphics library; in fact, it is a small subset, and any program written for it should work with Bopagopa. Bopa is provided as a separate library because it is easier to install and understand than the full Bopagopa.
This web page is a tutorial and user manual rather than a comprehensive reference. It is written for readers who have some experience with Python but no experience in computer graphics. It covers Bopa version 2010 February 26.
Getting Started
In order to program with Bopa you must have Python (2.5.4, say), Python Imaging Library, NumPy, and PyOpenGL installed. You must also have the Bopa library file bopa.py.
Here is a first example of a Bopa program. Type this code into a text editor, save the code to a file such as bopaexample.py, and then execute the file by typing python bopaexample.py in a terminal.
import bopa

mywindow = bopa.Window()
myrectangle = bopa.Rectangle()
myrectangle.setWidthHeight(50, 70)
mywindow.beginLoop()
You should get a black window with a white rectangle in the lower left. Even this tiny example illustrates several important points:
- Every Bopa program begins by creating a
Window. The window serves two purposes: It displays graphics, and it receives user input via the mouse and keyboard.
- Every Bopa program ends by telling the window to run its user interface loop. That is, the window endlessly repeats "get user input and respond", until the user ends the program.
- When a shape such as a rectangle is created, the window is automatically notified. Whenever the shape needs redrawing (for instance, when you resize the window or move the shape), everything is handled automatically by the window.
- Bopa classes often come with nice default values. The window's default background color is black. The rectangle's default color is white. On the other hand, the rectangle's default width and height were 0, so we had to set those manually.
- The user can drag the rectangle around the window with her mouse. This is because
Window comes with a default method for responding to mouse drags. You can easily customize how Window responds to this and other kinds of user input.
For a more complicated example, see the bopademo.py demo file that accompanies Bopa. Over the next few sections we cover just about everything needed to understand it.
Methods Common To All Shapes
Bopa comes with several basic shapes such as circles and rectangles. All of these shapes are subclasses of the Overlay class, which defines the following methods. (The term "overlay" is a remnant from the Bopagopa library. In Bopa, there is nothing "under" the overlays; in Bopagopa, there may be a whole 3D world under them.)
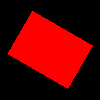
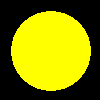
The color of a shape is specified by a tuple of four floating-point numbers between 0.0 and 1.0. The first number is the amount of red, the second is the amount of green, the third is the amount of blue, and the fourth is the opacity. For example,
- (1.0, 0.0, 0.0, 1.0) is opaque bright red.
- (0.0, 1.0, 0.0, 1.0) is opaque bright green.
- (0.0, 0.0, 1.0, 1.0) is opaque bright blue.
- (1.0, 1.0, 0.0, 1.0) is opaque bright yellow.
- (1.0, 1.0, 1.0, 1.0) is opaque white.
- (0.5, 0.5, 0.5, 1.0) is opaque gray.
- (0.0, 0.0, 0.0, 1.0) is opaque black.
- (1.0, 0.0, 0.0, 0.5) is translucent red.
These two methods control a shape's color.
setColor(self, rgba)
Sets the color to the given (r, g, b, a) tuple. The default is opaque white, (1.0, 1.0, 1.0, 1.0).
getColor(self)
Returns the color as an (r, g, b, a) tuple.
You can control the position of the shape using these three methods.
setPosition(self, xy)
Sets the position to the given (x, y). The default is (0, 0).
getPosition(self)
Returns the position (x, y).
translate(self, v)
Adds v = (dx, dy) to the current position.
Any shape can be oriented in any direction you like. For example, a rectangle doesn't have to have its edges aligned with the edges of the window; it can run diagonally across the window. The following three methods control orientation. (Remember that to convert from degrees to radians you just multiply by math.pi / 180.0. For example, 90 degrees = π / 2.)
setAngle(self, angle)
Sets the orientation angle, measured counterclockwise in radians from the positive x-axis (as is standard in mathematics). The default is 0.
getAngle(self)
Returns the orientation angle.
rotate(self, angle)
Adds the given angle to the orientation angle.
Overlay has a bit more functionality than we've covered here. For one thing, it has a facility for attaching one shape to another; see the "Child Shapes" section below.
The Various Kinds Of Shapes
This section lists the most important attributes of the built-in Bopa shapes. For secondary attributes, such as the number of samples used to approximate a curve, read the code. Keep in mind that every one of these shapes is also an Overlay.
| A Rectangle has width and height.
setWidthHeight(self, width, height)
Sets the rectangle's width and height. The defaults are 0. The width and height can be retrieved with getWidth(self) and getHeight(self).
|
| A Circle is specified by its radius.
setRadius(self, radius)
Sets the circle's radius, ensuring that it is nonnegative. The default is 0. The radius can be retrieved with getRadius(self).
|
| An annulus is a ring or washer shape, like a circle with a smaller circle cut out of it. It is described by two radii — the radii of the inner and outer circles. A circle is essentially an annulus with inner radius 0. A sector is a section of an annulus or circle made by cutting from the center to the edge along two radial rays. Here are the methods for Sector.
setRadii(self, inner, outer)
Sets the radii, making sure that inner is nonnegative 0 and outer is greater than or equal to inner. The defaults are 0. The radii can be retrieved with getInnerRadius(self) and getOuterRadius(self).
setAngles(self, start, end)
Sets the starting and ending angles of the sector (measured in radians, counterclockwise from the positive x-axis, as is standard in mathematics). The defaults are 0, which indicate specially that the sector should be drawn as a full circle/annulus. The angles can be retrieved with getStartingAngle(self) and getEndingAngle(self).
|
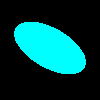
| An Ellipse is also like a circle, but stretched in one direction. It is specified by a horizontal radius and a vertical radius.
setRadii(self, a, b)
Sets the horizontal and vertical radii of the ellipse, ensuring that they are both nonnegative. The defaults are 0. The radii can be retrieved with getHorizontalRadius(self) and getVerticalRadius(self).
|
| A RoundedRectangle is a rectangle whose corners have been rounded off so that it is safe for elementary school use.
setWidthHeight(self, width, height)
Sets the width and height of the rounded rectangle, meaning the width and height of the circumscribed rectangle. The defaults are 0. The width and height can be retrieved with getWidth(self) and getHeight(self).
setRadius(self, radius)
Sets the radius of the quarter-circles at the corners of the rounded rectangle. The default is 0. The radius can be retrieved with getRadius(self).
|
|
The ConvexPolygon class lets you specify a polygonal shape as a list of vertices. The code is guaranteed to work only for convex polygons (ones with no indentations). To draw a nonconvex polygon, break it up into convex pieces and draw each as a ConvexPolygon.
setVertices(self, vertices)
Sets the polygon's vertex list to the given list. The vertices must be given in counterclockwise order.
getVertices(self)
Returns the list of vertices. The user may alter the list as she desires.
|
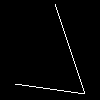
| A Line is a sequence of line segments formed by joining a sequence of points together. The points are called vertices. In the example at left, three vertices were used — in fact, the same three vertices as for the ConvexPolygon example above. The methods for Line are identical to those for ConvexPolygon.
setVertices(self, vertices)
Sets the line's point list to the given list.
getVertices(self)
Returns the list of points. The user may alter the list as she desires.
|
| The Text shape draws text, but it is quite limited. The text itself must be very simple — for example, no carriage returns. Only a small set of fonts and sizes is available. The text is often jagged and shabby-looking. The text appears right-side up no matter how the Text shape is oriented. Finally, if the bottom left corner of the text is off-screen then none of the text appears. The Text class should be improved in future releases of Bopa, but for now it is adequate for the most basic purposes. Here are its methods.
setText(self, text)
Sets the text string to be displayed. The default is the empty string. The string can be retrieved with getText(self).
setFont(self, font)
Sets the font. The only options are GLUT_BITMAP_8_BY_13, GLUT_BITMAP_9_BY_15, GLUT_BITMAP_TIMES_ROMAN_10, GLUT_BITMAP_TIMES_ROMAN_24, GLUT_BITMAP_HELVETICA_10, GLUT_BITMAP_HELVETICA_12 (the default), and GLUT_BITMAP_HELVETICA_18. (You must execute from OpenGL.GLUT import * to get these font identifiers.)
getTextWidth(self)
Returns the width of the text string, in pixels, when rendered in the current font.
|
| Finally, Sprite is a subclass of Rectangle that displays an image loaded from a file (JPEG, GIF, etc.). Translucency is supported. The width and height of the image file must be powers of 2. You set the width and height of the sprite itself using Rectangle's methods, to any values you like; the image is scaled accordingly.
setImage(self, path)
Sets the image to the one at the given path. The path can be absolute or relative to the directory containing the program.
scaleImage(self, scale=1.0)
Sets the underlying Rectangle's height and width so that the image is scaled by the given factor.
|
Child Shapes
Any shape can be attached to any other shape as its "child". The child's position and orientation are defined relative to the parent. When the parent translates or rotates, the child automatically translates or rotates with it. This is useful when you want to construct a complicated shape out of many parts. If the parts are connected by parent/child relationships, then they act as if they're glued together.
To make a parent/child relationship, you first make the parent. Then you make the child, passing the parent to the child's initializer. For example, the following code makes a rectangle with two attached circles.
import bopa

mywindow = bopa.Window(100, 100)
myrectangle = bopa.Rectangle()
myrectangle.setWidthHeight(25, 50)
myrectangle.setColor((1.0, 0.5, 0.0, 1.0))
mycircle = bopa.Circle(myrectangle)
mycircle.setRadius(20)
myothercircle = bopa.Circle(myrectangle)
myothercircle.setRadius(10)
myothercircle.setPosition((25, 50))
mywindow.beginLoop()
The result is something like the following picture. When you drag anywhere on the rectangle or the circles, the whole family moves as a unit. Notice that the children are drawn on top of the parent.

For two more examples of attaching children, see the bopademo.py demo program. Here we simply list the two relevant Overlay methods.
__init__(self, parent=None)
Initializes the overlay as a child of the given parent. If the parent is None, then the overlay is simply added to the current Bopa window; it will show up in Window.getOverlays().
getChildren(self)
Returns a list consisting of the overlay's children. The user may alter this list as she desires.
Window Basics
The Window class is the very heart of Bopa. All drawing and animation takes place in a window. The window processes all input from the keyboard and mouse. When you create a window at the start of your program, there are three optional arguments:
__init__(self, width=512, height=512, title='Bopa')
Initializes the window with the given width and height (in pixels) and title (which on most systems appears at the top of the window).
Remember that your program ends by calling Window.beginLoop() to start up the user interface loop. Between creating the window and starting the loop you can set up whatever shapes you like, using the classes described in the preceding sections. You can also hook up special user interface handlers to customize your program's behavior; those are described in the next section.
At any time, you can grab the current window from anywhere in your program using the built-in getCurrentWindow() function. I don't see why you can't write a Bopa-based program with more than one window, but this has not been tested, so I don't recommend it.
The following methods access the window's most basic properties. Animations and delays are covered in a later section.
getOverlays(self)
Returns the window's list of overlays (shapes). The user can alter this list as she desires. It is not necessary to add a newly-created overlay to this list manually; Overlay.__init__() does that automatically. Overlays that are children of other overlays do not show up in this list; they instead show up in their parents' getChildren() child lists.
getAnimations(self)
Returns the window's list of active animations, including delays. The user can alter this list as she desires. It is not necessary to add a newly-created animation/delay to this list manually; Animation.__init__() and Delay.__init__() do that automatically.
setColor(self, rgb)
Sets the window's background color to the given (r, g, b) tuple. Notice that translucency is not supported.
getColor(self)
Returns the window's background color as an (r, g, b) tuple.
Whenever you manually alter the contents of the window — for instance, change the position of a shape using Overlay.setPosition() — you need to instruct the window to redraw itself.
postRedisplay(self)
Informs the window that it needs to redraw its contents on its next pass through the user interface loop.
User Interface
This section is about the methods of Window that customize how it responds to user actions. Here are the basic ideas. The window is continually watching out for user actions. When it sees one, it classifies it into one of these categories:
- An ordinary key press, such as
't' for the T key.
- A special key press, such as
GLUT_KEY_F7 for the F7 key.
- A mouse click on empty space (not on an overlay).
- A mouse click on an overlay.
- A mouse drag that starts on empty space.
- A mouse drag that starts on an overlay.
The window has a handler function for each of these categories of user action. (Actually, the drag handlers are split into three parts, to handle the beginning, middle, and end of dragging.) The window passes information about the action to the handler function. Depending on the specific type of action, this information may consist of:
- One or more xy positions, indicating where the mouse is (or was) on the screen, in pixels measured from the lower-left corner of the window.
- In the case of a keyboard action, the key pressed.
- In the case of a mouse action on an overlay, a list of integer "names" indicating exactly which overlay (or child of an overlay, or child of child of ...) was clicked. For example, if the fourth child of the third child of the eighth overlay in the window was clicked, then you'll see a name list of
[8, 3, 4].
You as the programmer get to design and install whatever handler functions you like. For example, suppose that you want to move mycircle 13 pixels up or down every time the user presses the U or D keys. First you write a handler function like this:
def myKeyHandler(xy, key):
    if key == 'u':
        mycircle.translate((0.0, 13.0))
        mywindow.postRedisplay()
    elif key == 'd':
        mycircle.translate((0.0, -13.0))
        mywindow.postRedisplay()
Second, somewhere between creating the window and launching its user interface loop you attach the handler to the window like this:
mywindow.setKeyboardHandler(myKeyHandler)
That's all there is to it; you know have working keyboard controls.
The only user interface handler that has a default implementation in Window is the overlay drag handler, which lets the user drag the overlay around the window. The other user interface handlers default to None. (Setting any handler to None causes that category of action to be ignored.)
Let's begin with the two keyboard handlers. By the way, key repeating (which happens when the user holds down a key) is currently disabled.
setKeyboardHandler(self, function)
Sets the keyboard handler function/method, which should have the form keyboardHandler(xy, key).
setSpecialHandler(self, function)
Sets the keyboard handler function for special keys, which should have the form specialHandler(xy, key). The special keys are GLUT_KEY_LEFT, GLUT_KEY_RIGHT, GLUT_KEY_UP, GLUT_KEY_DOWN, GLUT_KEY_PAGE_UP, GLUT_KEY_PAGE_DOWN, GLUT_KEY_HOME, GLUT_KEY_END, GLUT_KEY_INSERT, GLUT_KEY_F1, ..., GLUT_KEY_F12. (You must execute from OpenGL.GLUT import * to get these key identifiers.)
The shift, control, and alt keys do not appear in the list of special keys. When the user presses them, no key event is reported to the window. However, you can still incorporate them into your user interface.
getModifiers(self)
Call this method while responding to any user interface event. Returns a list of three Booleans, indicating whether the shift, control, and alt keys were down at the time of the event.
The remaining methods deal with mouse actions. The first two methods let you handle those occasions when the user clicks on empty space or on an overlay. By "click" I mean specifically clicking without dragging; dragging is handled below.
setEmptyClickHandler(self, function)
Sets the handler function for clicks on empty space, which should have the form emptyClickHandler(xy).
setOverlayClickHandler(self, function)
Sets the handler function for clicks on overlays, which should have the form overlayClickHandler(xy, names).
Our next methods set handler functions for the beginning, middle, and end of a mouse drag on empty space. It is important to note that at the start of a drag, the begin-drag handler is called, and then the drag handler is immediately called as well. While the drag is underway, the drag handler is called repeatedly. At the end of a drag, the end-drag handler is called.
setBeginEmptyDragHandler(self, function)
Sets the handler function for beginning drags on empty space, which should have the form beginEmptyDragHandler(xyStarting, xyCurrent).
setEmptyDragHandler(self, function)
Sets the handler function for drags on empty space, which should have the form emptyDragHandler(xyStarting, xyPrevious, xyCurrent).
setEndEmptyDragHandler(self, function)
Sets the handler function for ending drags on empty space, which should have the form endEmptyDragHandler(xyStarting, xyPrevious, xyFinal).
Similarly, these three methods set handler functions for mouse drags on overlays.
setBeginOverlayDragHandler(self, function)
Sets the handler function for beginning drags on overlays, which should have the form beginOverlayDragHandler(xyStarting, xyCurrent, names).
setOverlayDragHandler(self, function)
Sets the handler function for drags on overlays, which should have the form overlayDragHandler(xyStarting, xyPrevious, xyCurrent, names).
setEndOverlayDragHandler(self, function)
Sets the handler function for ending drags on overlays, which should have the form endOverlayDragHandler(xyStarting, xyPrevious, xyFinal, names).
Delays And Animations
This section describes two classes related to time. The Delay class lets you call a function at a specified time in the future. The Animation class lets you animate moving shapes and do other interpolations based on time. It is important to note that these classes do not guarantee exact timing; they are approximate. They are suitable for use in a casual video game, not an air traffic control system.
Let's say you want to make the function call myfunction(myargment), but you want to do it 0.25 seconds from now. Here is a poor solution:
time.sleep(0.25)
myfunction(myargument)
(I assume that you've already imported time.) The problem with that technique is that your program completely stops for 0.25 seconds. In real-time applications such as video games, you want to schedule tasks for the future in a way that lets you keep doing other tasks until that future arrives. Here's how you solve the problem with Bopa.
present = time.time()
mytask = Delay(present + 0.25, myfunction, [myargument])
That's all there is to it. You don't need to do anything with mytask; it has already registered itself with the current Bopa window, which is handling the passage of time for you.
This technique works not just on stand-alone functions but also on methods. Suppose that you want an object mybike to call self.jump(17) 3.1 seconds from now. You do this:
present = time.time()
mytask = Delay(present + 3.1, mybike.jump, [17])
Suppose that you want to call a function with more than one argument, as in myfunction(11, 14, 7). No problem:
present = time.time()
mytask = Delay(present + 3.1, myfunction, [11, 14, 7])
An Animation is similar to a Delay, but its effect is usually gradual and its argument types are more limited. Suppose that you want an ellipse called myellipse to move from its current location, (50.4, 60.3), to a new location, (71.6, 71.8), over the next 0.5 seconds. You first calculate the net translation, which is (71.6, 71.8) - (50.4, 60.3) = (21.2, 11.5). Then you create an animation to handle that translation:
present = time.time()
mytask = Animation(present, present + 0.5, myellipse.translate, (21.2, 11.5))
As you can probably guess, the first two arguments to Animation.__init__() are the starting and stopping time for the animation. The third argument is the function/method to call, and the fourth argument is the input to the function/method.
The fourth argument to Animation.__init__() must be of one of the following types. As time passes, the function/method is repeatedly called on a scaled-down version of the input. The amount of scaling equals the fraction of the animation time that has passed since the last frame of the animation. If the method in question is appropriately "additive" — as Overlay.translate() and Overlay.rotate() are, for example — then the net effect of the animation is to call the function/method on the input once. Here are the allowed types.
- A float
x.
- A tuple
(x, y) of two floats, such as a two-dimensional vector.
- A tuple
(x, y, z) of three floats, such as a three-dimensional vector.
- A tuple
(r, g, b, a) of four floats, such as an RGBA color.
- A tuple
(a, (u, v, w)) consisting of a float and a tuple of three floats.
In the first four cases, all floats in question are scaled by the fraction of the animation's time that has passed since the last animation. In the last case, only the solitary float is scaled. (This last case exists to animate 3D rotations in Bopagopa.)
There are optional fifth and sixth arguments to Animation.__init__(). The fifth argument is the number of times to repeat the animation. It defaults to 1. If it is None, then the animation loops forever. The sixth argument is an optional time-rescaling function. For example, passing 1.0 for the fifth argument and the built-in Bopa function cubicBijection for the sixth argument causes the animation to start and end gently.
Where Do We Go From Here?
Once you are comfortable working with Bopa you may want to try out Bopagopa. Bopagopa is a 3D graphics library in which you can build scenes out of simple shapes such as boxes, cylinders, and spheres, as well as some more complicated objects. The window is then like a virtual window looking out onto a virtual 3D world. You can superimpose 2D shapes on the window, between the viewer and the 3D world. These shapes, called overlays, are what you've been using in Bopa. In other words, Bopa is Bopagopa with all of its 3D functionality stripped out. Compared to Bopagopa, Bopa is easier to understand (because it's shorter and less math-intense) and easier to install (because it does not require the Open Dynamics Engine).