2019 February 8,
Except where otherwise noted, all assignments are due at the start of the next class meeting. Except where otherwise noted, you may work with one partner if you wish. When two people work together, they hand in just one copy of the work, that has both of their names on it.
This first part of the Day 01 work is due at 11:59 PM on the first day of class. Do it individually — not with a partner. Read the syllabus (the course web page). In a text editor (not a word processor), make a plain text file (not a Word, RTF, PDF, etc. document) containing your answers to the following questions.
When you're done, mount the COURSES file server and drop your text file in your hand-in folder there. Warning: Once you hand in your file, you will not be able to edit it.
The rest of the Day 01 work is due at the start of class on Day 02. You may work with a partner if you wish. I assume that you're working on a lab machine in CMC 306 or CMC 304. If you want to work on your own computer, then try the installation instructions on our course web site. If you can't get them to work right away, then work in a lab.
000helloWorld.c: Study this file, which means: Read it, follow the instructions for compiling and running it, figure out what each line of code does, and try variations if anything is unclear.
000intsDoubles.c: Study this file.
000ifWhileFor.c: Study.
000functions.c: Study.
000pixel.h, 000pixel.o: Download these. Feel free to read 000pixel.h, but you're not expected to understand it yet.
000linking.c: Study.
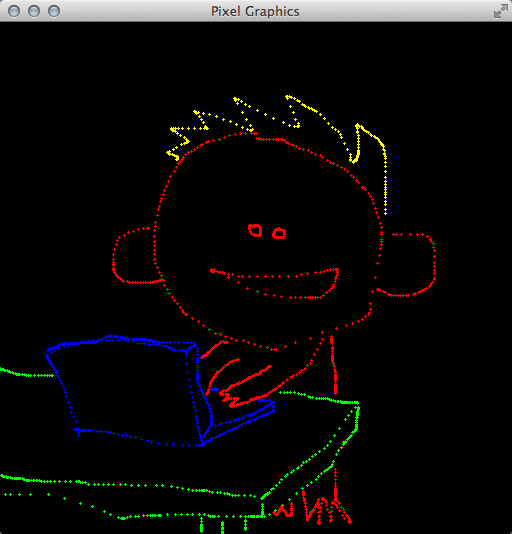
010mainPainting.c: Make a copy of 000linking.c called "010mainPainting.c". Edit this file to make a simple painting program. Your program should make strokes of color whenever the user drags the mouse across the window. (Dragging means moving the mouse cursor while holding down the left mouse button.) Your program should also let the user change the paint color by pressing the R, G, B, C, M, Y, K, and W (white) keys. Do not be afraid to use global variables (declared outside all functions). You may add other features as you like. For example, my program lets the user clear the window and change the brush size. Here's a screenshot:
Make sure that your code is functioning, clean, and commented. If you are working with a partner, then both names should be listed in a comment near the top of the file. Make sure that both of you have a copy of your work, for future reference. But only one of you places your 010mainPainting.c into her or his hand-in folder on COURSES, by the start of class on Day 02.
If you have more time, then feel free to work ahead. Start with 000arrays.c, 000vectors.pdf, and 030vector.c from the next block of homework. If you have even more time, work on 000matrices2By2.pdf, 000matrices2By2.c, and 030matrix.c from the block after that.
Today we start implementing our first graphics engine. It is based on the core concept of rasterizing a triangle. It is important that you carefully write and thoroughly test the code that you write here.
020triangle.c: Make this file. In it write the following function to rasterize a triangle. The inputs are three vertices of a triangle and an RGB color. Assume that the vertices are not co-linear. Assume that they are given in counter-clockwise order. Make no other assumptions. For each pixel in the triangle, the function calls pixSetRGB with the given RGB color. Write helper functions if you wish.
void triRender(const double a0, const double a1, const double b0,
		const double b1, const double c0, const double c1, const double r,
		const double g, const double b) {

}
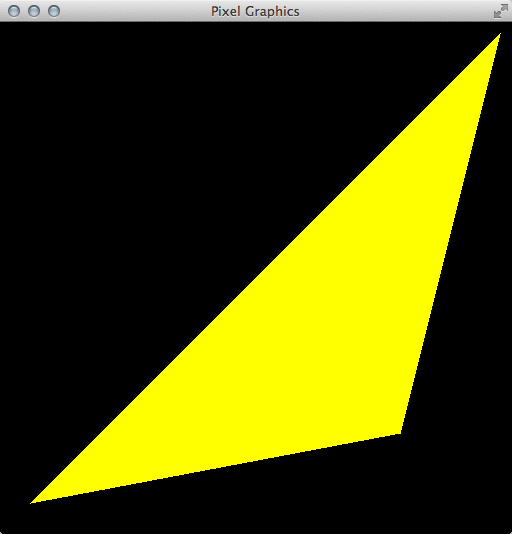
020mainRasterizing.c: Make this file. Near the top, but after all header files, #include 020triangle.c to include your rasterizer code. In the main function, demonstrate that your rasterizer works. Here's a screenshot of mine:
Make sure that 020triangle.c and 020mainRasterizing.c are functioning, clean, and commented. In comments near the tops of the files, make sure that both students in your partnership are credited. Make sure that both students have copies of these files for future reference. Then just one student places the file in her or his hand-in folder on COURSES.
000arrays.c: Study.
000vectors.pdf: Study.
030vector.c: This file specifies the interfaces for various vector functions. Fill in the implementations. (We add to this file in the coming weeks.)
If you have more time, then work on 000matrices2By2.pdf, 000matrices2By2.c, and 030matrix.c from the next block of homework.
Today we add the ability to interpolate quantities across triangles. Interpolation is the second-most fundamental concept in our graphics engine, after rasterization. It enables a variety of subtle graphical effects throughout the course.
030triangle.c: Make a copy of your 020triangle.c. In it, alter your rasterizer to use C arrays wherever appropriate. For starters, the interface of the triRender function should be changed as follows. (In the implementation, a0 becomes a[0], etc.)
void triRender(const double a[2], const double b[2], const double c[2],
		const double rgb[3])
030mainInterpolating.c: In a copy of 020mainRasterizing.c, include 030triangle.c rather than 020triangle.c. Update your demonstration code to make sure that the new triRender works, before proceeding to the next steps.
000matrices2By2.pdf: Study.
000matrices2By2.c: Study.
030matrix.c: This file specifies the interfaces for various matrix functions. Fill in the implementations. (We add to this file in the coming weeks.)
030mainTest.c: This is optional. I'm adding it on the morning of Saturday 2019 January 12, to help you test your code up to this point. Without editing this program at all, you should be able to compile and run it. It should show a large yellow triangle slowly rotating. If you encounter any errors, then something is wrong in your 030vector.c, 030matrix.c, and/or 030triangle.c.
030triangle.c: Implement linear interpolation of color. The interface for triRender is now
void triRender(const double a[2], const double b[2], const double c[2],
		const double rgb[3], const double alpha[3], const double beta[3],
		const double gamma[3])
where the three new parameters are RGB colors. Modulate the interpolated color with the uniform color rgb. Where appropriate, use functions from 030vector.c and 030matrix.c. (But don't include those files here. They are included in 030mainInterpolating.c.)
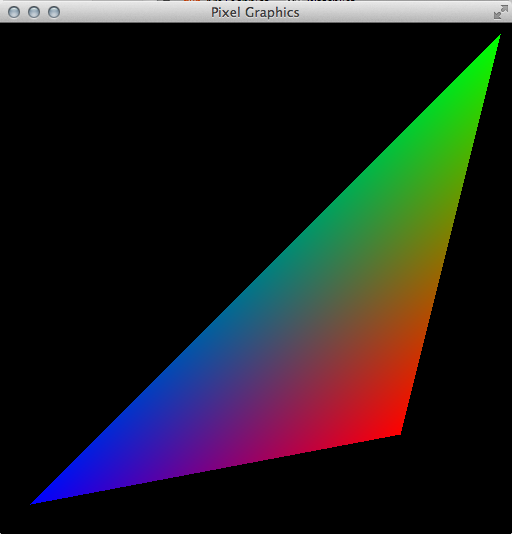
030mainInterpolating.c: Include 030vector.c and 030matrix.c, in addition to 030triangle.c. Demonstrate that your color interpolation works. Here's a screenshot of mine:
You have four files to hand in: 030vector.c, 030matrix.c, 030triangle.c, and 030mainInterpolating.c. As usual, check that your files are functioning, clean, and commented, both partners are credited, and both partners have copies. Then submit one copy of the files to COURSES.
If you have more time, then work on 000pointers.c and 000structs.c from the next block of homework.
Frankly, interpolating color is not the most important use of interpolation. What's the most important use? There are a few contenders, but texture mapping is definitely among them.
000pointers.c: Study.
000structs.c: Study.
stb_image.h: Download. This is a public-domain image-loading library. Despite the ".h" suffix, it's not just function interfaces but also implementations. You are not expected to read it. Parts of it are hard to understand unless you know C well. This library is used by a certain function in 040texture.c, which I have already written for you.
040texture.c: Skim this file, which means: You should be familiar with all of the constants, structs, and functions, but you may not understand the details of some of the function implementations. This file defines a data type, texTexture, that we use for texture mapping. It's all complete, except that the texSample function is missing one key feature: When asked for linear filtering, it responds with nearest-neighbor filtering. You fill in that feature later in this assignment. For now, just pretend that linear filtering is working.
040triangle.c: In a copy of 030triangle.c, update triRender to have the following interface. The quantities being interpolated are now texture coordinates, not colors. Just before you call pixSetRGB, perform a texture lookup using texSample. Modulate that texture RGB by rgb. Pass that modulated color to pixSetRGB.
void triRender(const double a[2], const double b[2], const double c[2],
		const double rgb[3], const texTexture *tex, const double alpha[2],
		const double beta[2], const double gamma[2])
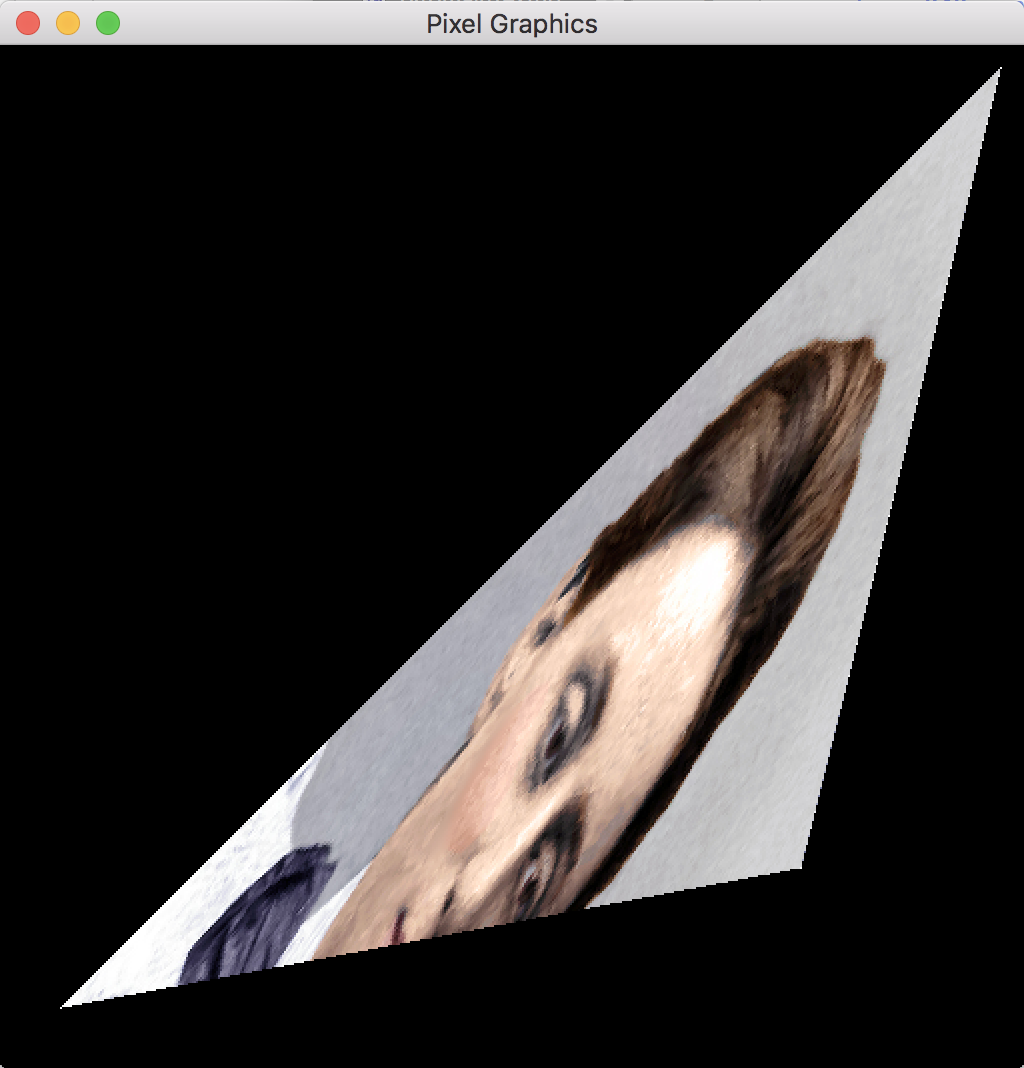
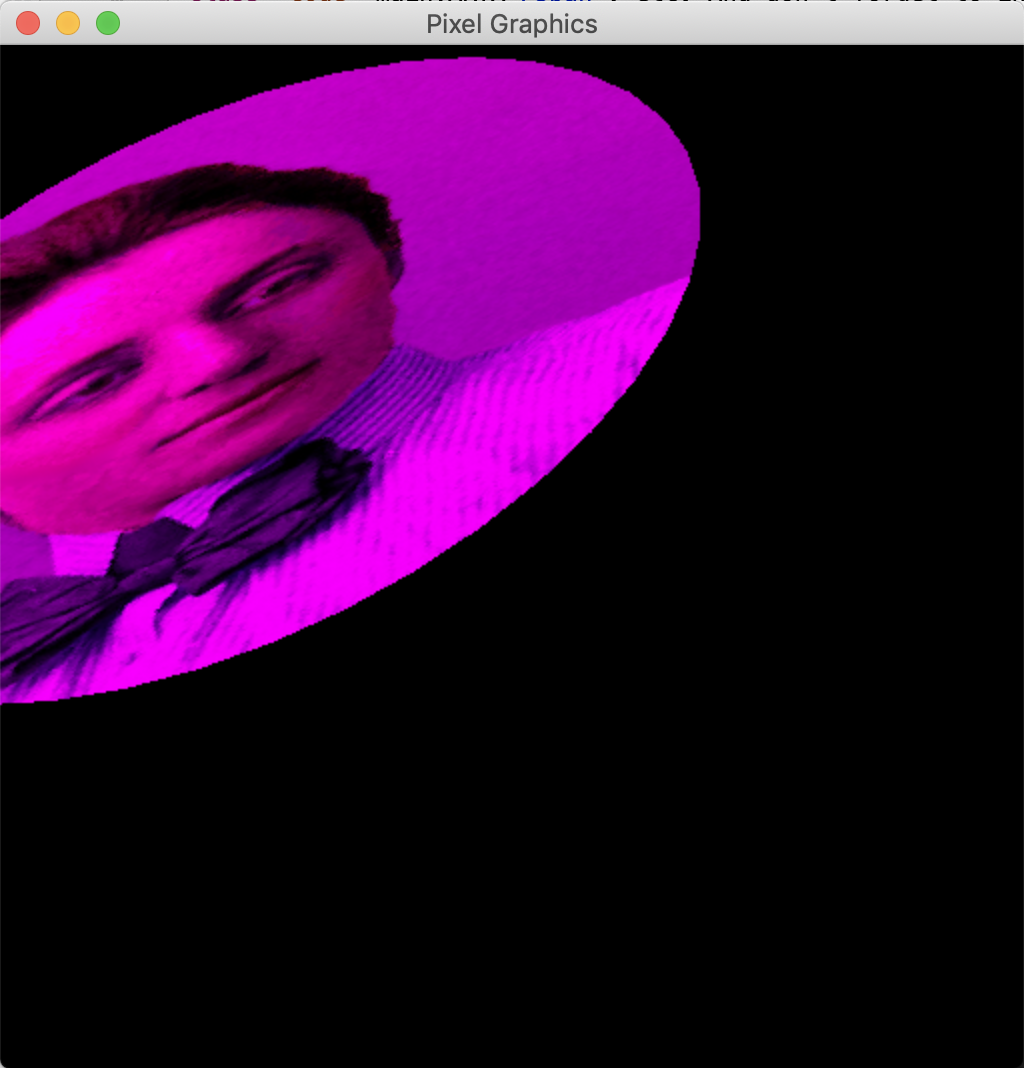
040mainTexturing.c: In a copy of 030mainInterpolating.c, include 040texture.c and demonstrate your new triRender. Of course, somewhere you'll have to make a texTexture texture to pass to triRender. Use texInitializeFile, and don't forget to texDestroy at the end. For reasons that we'll discuss elsewhere, grayscale images might not work well; use a full-color RGB image. Here's a screenshot of my program, which uses a photograph of Emmy Noether:
040texture.c: Now let's implement linear filtering. Find the relevant part of texSample, and replace it with your own linear filtering code. Do not assume that the texels are RGB colors. Instead assume that they are arrays of dimension tex->texelDim.
040mainTexturing.c: Add a keyboard handler, so that by pressing GLFW_KEY_ENTER the user can quickly switch between nearest-neighbor and linear filtering. It will help you and the grader evaluate your filtering. If you cannot see much of a difference, then try using a coarser image (fewer pixels wide and tall).
In the usual way, clean up 040mainTexturing.c and all of the files on which it depends: 040texture.c, 040triangle.c, and whatever image you're using. Share them with your partner, and submit them to COURSES.
Today we abstract a crucial part of our code. This abstraction makes our graphics engine much more flexible. (It also aligns our engine better, with how graphics is done in the real world.)
050shading.c: Create this file. In it, define a struct data type, following 000structs.c, called shaShading. Right now it just has three int members: unifDim, texNum, and attrDim. (Later in the course it holds more information.)
050mainAbstracted.c: Study this file, but you will not be able to run it yet, because of three issues. The first issue is that you haven't written the colorPixel function. The second issue is that you don't have 050triangle.c. The third issue is that you have to change the name of the image file in main. Let's deal with these issues in reverse order. Change the name of the image file.
050triangle.c: Make a copy of 040triangle.c. In it, update the interface for triRender to the one below. You now have an array of uniform information, an array of texture pointers, three arrays of vertex attributes, and a shaShading struct that specifies how many elements are in each of those arrays. Edit your implementation so that, at each rasterized pixel, it computes an interpolated attribute array attr of dimension sha->attrDim, invokes colorPixel to get an RGB color, and passes this color to pixSetRGB. (Let me emphasize that pixSetRGB is called from triRender, not from colorPixel.)
/* Assumes that the 0th and 1th elements of a, b, c are the 'x' and 'y'
coordinates of the vertices, respectively (used in rasterization, and to
interpolate the other elements of a, b, c). */
void triRender(const shaShading *sha, const double unif[],
		const texTexture *tex[], const double a[], const double b[],
		const double c[])
050mainAbstracted.c: Now write colorPixel. It should modulate a texture color, interpolated color, and uniform color all together. Here's mine:

060mainEffect.c: Make a copy of 050mainAbstracted.c. Edit it to produce an entirely different visual effect. Be creative. My only requirement is that you must use at least two textures. The most interesting edits are in colorPixel, but there have to be some supporting edits throughout 060mainEffect.c. The rest of your files, such as 050triangle.c and 050shading.c, should be unchanged. For example, mine is below. I use the texture coordinates to sample an RGB from a cloud texture, then use the RG from that RGB as texture coordinates to sample the final RGB from my usual Emmy Noether texture.
If you like, e-mail me a screenshot of your program looking cool, that I can show in class. In your e-mail, briefly (one or two sentences) explain how you made your effect.
In the usual way, clean up 050mainAbstracted.c, 060mainEffect.c, and all of the files on which they depend. Share them with your partner, and submit them to COURSES.
070mesh.c: Skim. This file implements a data type for triangular meshes. You can see initializer functions, accessor functions, a destroyer function, functions to read and write files, and convenience functions for building common kinds of meshes. There's also meshRender. Fill in its implementation, using other functions such as meshGetTrianglePointer, meshGetVertexPointer, and triRender. Don't overlook the part of the specification about attrDim.
070mainMesh.c: Include 070mesh.c after 050triangle.c. Demonstrate that your mesh renderer is working correctly. I recommend using the convenience mesh builders and one texture.
Now we make a big change to our graphics engine. It requires alterations to several files (because our engine is not very well abstracted, because we're learning how to abstract it right now). The change is: What we used to call attributes are now either attributes or varyings, depending on whether they exist before or after the vertex transformation.
080shading.c: Add an int varyDim member to the shading struct.
080triangle.c: Your triangle code will never again see an attribute vector. It will see varying vectors instead. Make all required changes. For example, replace sha->attrDim with sha->varyDim. When I did this, my code had a bunch of variable names and comments that referred to attributes, so I took this opportunity to clean those up too.
080mainPosable.c: Because colorPixel is called only by triRender, and triRender sees varyings not attributes, it follows that colorPixel sees varyings not attributes. So, in colorPixel, replace attr with vary, mainATTRX with mainVARYX, etc. Just below colorPixel, add the transformVertex function below. Above colorPixel, keep the constants mainATTRX, etc., but add constants mainVARYX, etc. And don't forget to initialize the varyDim member of your shading struct in main.
/* Outputs vary, based on the other parameters, which are unaltered. Like
colorPixel, this function should not access any variables other than its
parameters and any local variables that it declares. */
void transformVertex(int unifDim, const double unif[], int attrDim,
		const double attr[], int varyDim, double vary[]) {
    /* For now, just copy attr to vary. Baby steps. */
    vary[mainVARYX] = attr[mainATTRX];
    vary[mainVARYY] = attr[mainATTRY];
    vary[mainVARYS] = attr[mainATTRS];
    vary[mainVARYT] = attr[mainATTRT];
}
080mesh.c: In meshRender, use transformVertex to transform attributes to varyings before passing them to triRender. Perhaps you can imagine a couple of ways to do this. I recommend that you pursue the simplest, easiest option — for now, at least.
080mainPosable.c: Test whether everything works up to this point. Then add one uniform to express rotation and two uniforms to express translation. Implement the rotation followed by translation in transformVertex. I recommend that you have a time step handler that animates the rotation and/or translation, because animations give you more debugging information than still images do. Here's a still image of my program:
Clean up and hand in 080mainPosable.c and its dependencies. (You are not required to hand in 070mainMesh.c.)
Today's work doesn't really add any new features. Instead, it cleans up, accelerates, and stress-tests the code that we already have. That's all valuable work at this moment in the course, because we're about to transition to 3D.
000functionPointers.c: Study.
090shading.c: Add colorPixel and transformVertex members to the shading struct. They are function pointers.
090triangle.c: Replace colorPixel with sha->colorPixel.
090mesh.c: Replace transformVertex with sha->transformVertex.
090mainAbstracted.c: Study this file, focusing on the two comments that describe crucial changes. Change the name of the image but nothing else in this file. Test that it works with the rest of your code. If not, then fix the rest of your code, not this file.
Now our code is better abstracted than it used to be. The next issue is that our approach to writing transformVertex is inefficient (why?), and it will become more inefficient as the course progresses. So let's take this opportunity to restructure the code a bit.
000matrices3By3.pdf: Study. (This tutorial was updated on 2019 January 8. So read it again, if you read an earlier version.)
100matrix.c: Implement the following functions.
/* Multiplies the 3x3 matrix m by the 3x3 matrix n. The output CANNOT safely
alias the input. */
void mat333Multiply(const double m[3][3], const double n[3][3],
		double mTimesN[3][3])

/* Multiplies the 3x3 matrix m by the 3x1 matrix v. The output CANNOT safely
alias the input. */
void mat331Multiply(const double m[3][3], const double v[3],
		double mTimesV[3])

/* Builds a 3x3 matrix representing 2D rotation and translation in homogeneous
coordinates. More precisely, the transformation first rotates through the angle
theta (in radians, counterclockwise), and then translates by the vector t. */
void mat33Isometry(double theta, const double t[2], double isom[3][3])
100mainHomogeneous.c: Make a copy of 090mainAbstracted.c. Replace the three rotation-translation uniforms with nine uniforms. They store a 3x3 matrix. In your time step handler, configure this matrix using code like the code below. The rotation angle and translation vector are global variables, one or both of which are altered by the time step handler. mainUNIFMODELING is a compile-time constant storing the index of the first (0th) entry of the matrix in the uniforms. You are not expected to fully understand the pointer manipulation in the third line of code. Intuitively, it "packs" a 3x3 matrix into a 9-dimensional vector.
double isom[3][3];
mat33Isometry(rotationAngle, translationVector, isom);
vecCopy(9, (double *)isom, &unif[mainUNIFMODELING]);
100mainHomogeneous.c: In transformVertex, you can "unpack" the 9-dimensional vector back into a 3x3 matrix and use it as follows. You have to figure out what attrHomog and varyHomog are, and how they fit into the rest of your code. Once you're done, test your program. Its output should be slightly faster than, but otherwise identical to, that of 090mainAbstracted.c.
mat331Multiply((double(*)[3])(&unif[mainUNIFMODELING]), attrHomog, varyHomog);
Now your code is well-abstracted and efficient. Let's make a serious test of everything up to this point.
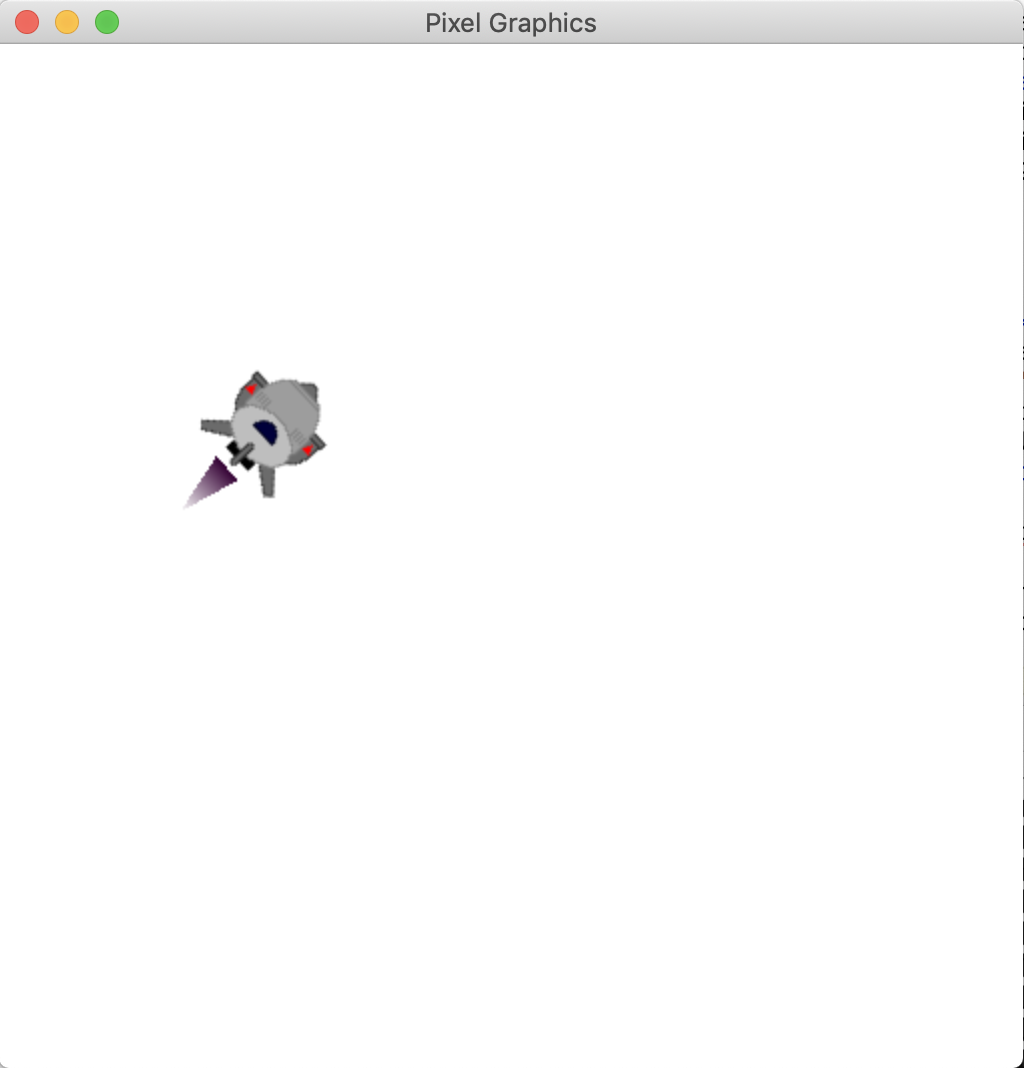
110mainShadings.c: Make a demo program that renders (at least) two meshes with two different shading structs. To make the shading structs genuinely different, let's say that they should have different shader functions attached. They may also differ in their integer members. For example, a screenshot of my program is below. The body of the spaceship is a square texture-mapped with one texture. The exhaust plume is a triangle with no texture. The exhaust plume fades in and out, depending on whether the user is firing the spaceship's main rocket. (My program is kind of like a video game, in which the user rotates, accelerates, and bounces the spaceship around the window. I did that for fun. You do not have to make a rich interactive experience.)
Clean up and hand in 110mainShadings.c and its dependencies. (You are not required to hand in 090mainAbstracted.c or 100mainHomogeneous.c.)
Today we transition from 2D to 3D. This change requires some math, which you will implement. It requires 3D meshes, which I have implemented for you. It requires numerous other small changes, as we discuss in class.
000vectorsMore.pdf: Study.
120vector.c: Implement the following functions.
/* Returns the dot product of the vectors v and w. */
double vecDot(int dim, const double v[], const double w[])

/* Returns the length of the vector v. */
double vecLength(int dim, const double v[])

/* Returns the length of the vector v. If the length is non-zero, then also
places a normalized (length-1) version of v into unit. The output can safely
alias the input. */
double vecUnit(int dim, const double v[], double unit[])

/* Computes the cross product of v and w, and places it into vCrossW. The
output CANNOT safely alias the input. */
void vec3Cross(const double v[3], const double w[3], double vCrossW[3])

/* Computes the vector v from its spherical coordinates. rho >= 0.0 is the
radius. 0 <= phi <= pi is the co-latitude. -pi <= theta <= pi is the longitude
or azimuth. */
void vec3Spherical(double rho, double phi, double theta, double v[3])
000matrices4By4.pdf: Study.
120matrix.c: Implement the following functions. You might find it useful to implement helper functions such as mat33Add. That's up to you.
/* Given a length-1 3D vector axis and an angle theta (in radians), builds the
rotation matrix for the rotation about that axis through that angle. */
void mat33AngleAxisRotation(double theta, const double axis[3],
		double rot[3][3])

/* Given two length-1 3D vectors u, v that are perpendicular to each other.
Given two length-1 3D vectors a, b that are perpendicular to each other. Builds
the rotation matrix that rotates u to a and v to b. */
void mat33BasisRotation(const double u[3], const double v[3],
		const double a[3], const double b[3], double rot[3][3])

/* Multiplies m by n, placing the answer in mTimesN. The output CANNOT safely
alias the input. */
void mat444Multiply(const double m[4][4], const double n[4][4],
		double mTimesN[4][4])

/* Multiplies m by v, placing the answer in mTimesV. The output CANNOT safely
alias the input. */
void mat441Multiply(const double m[4][4], const double v[4],
		double mTimesV[4])

/* Given a rotation and a translation, forms the 4x4 homogeneous matrix
representing the rotation followed in time by the translation. */
void mat44Isometry(const double rot[3][3], const double trans[3],
		double isom[4][4])
120mesh.c: This file contains a large new section with convenience functions for building 3D meshes. Skim it. The attribute dimensions are 3 + 2 + 3 = 8. The first three attributes are X, Y, Z position. The next two are S, T texture coordinates. We talk about the last three later in the course. This file also contains an unimplemented meshRender. Copy your meshRender code into this file.
120triangle.c: Now that we're working in 3D, it is possible that triRender will be passed a co-linear or clockwise-ordered triangle. When either of those happens, triRender should draw nothing. My code has always (since 030triangle.c) done this backface culling automatically, by checking that the determinant returned by mat22Invert is positive. If you've been doing the same, then 120triangle.c is just a copy of 090triangle.c. If you've not been doing the same, then you need to implement this feature now. The details depend on how your triRender code is structured. For example, some students reorder the vertices into clockwise order, which their algorithm then rasterizes. They might consider a cross product test before reordering, instead of my determinant test after reordering. If you don't know what I'm talking about, then re-read 000vectorsMore.pdf.
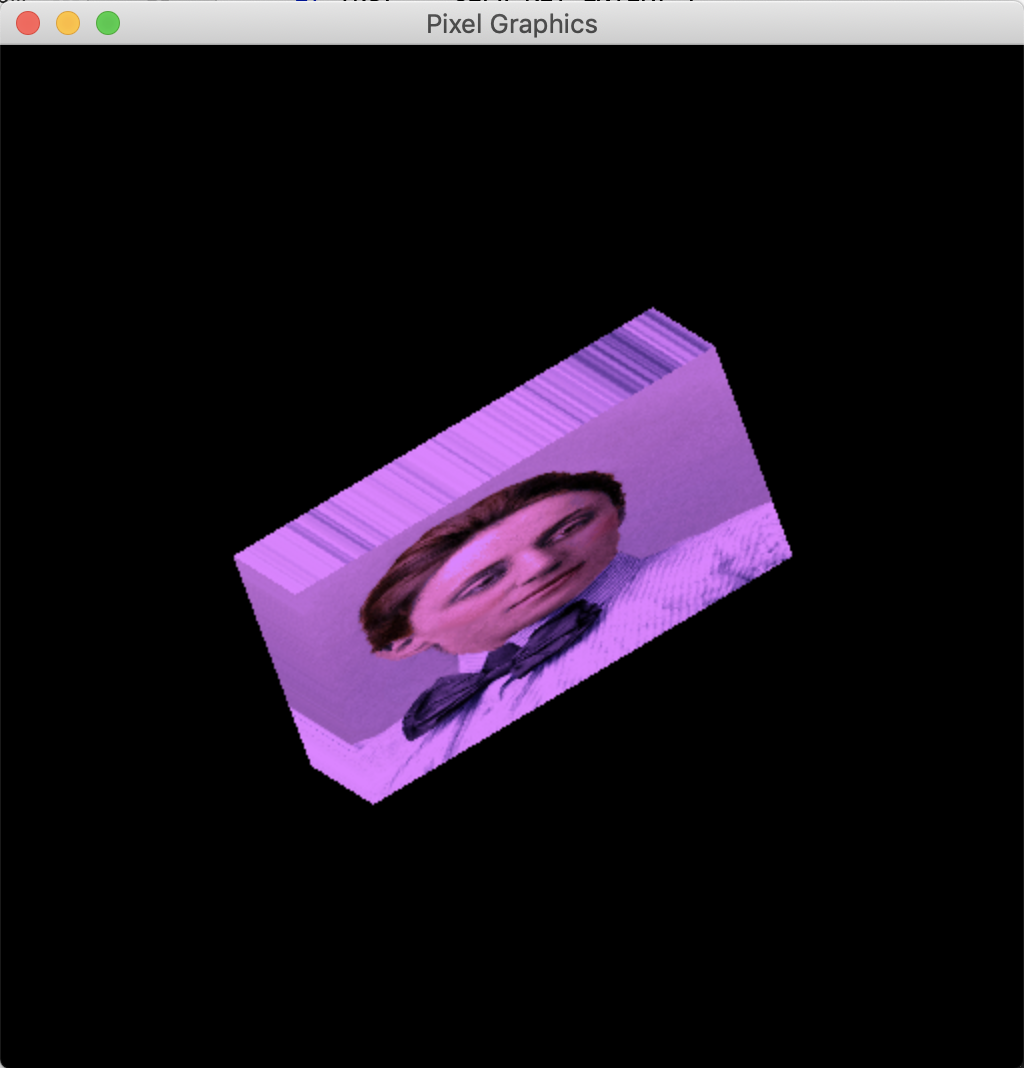
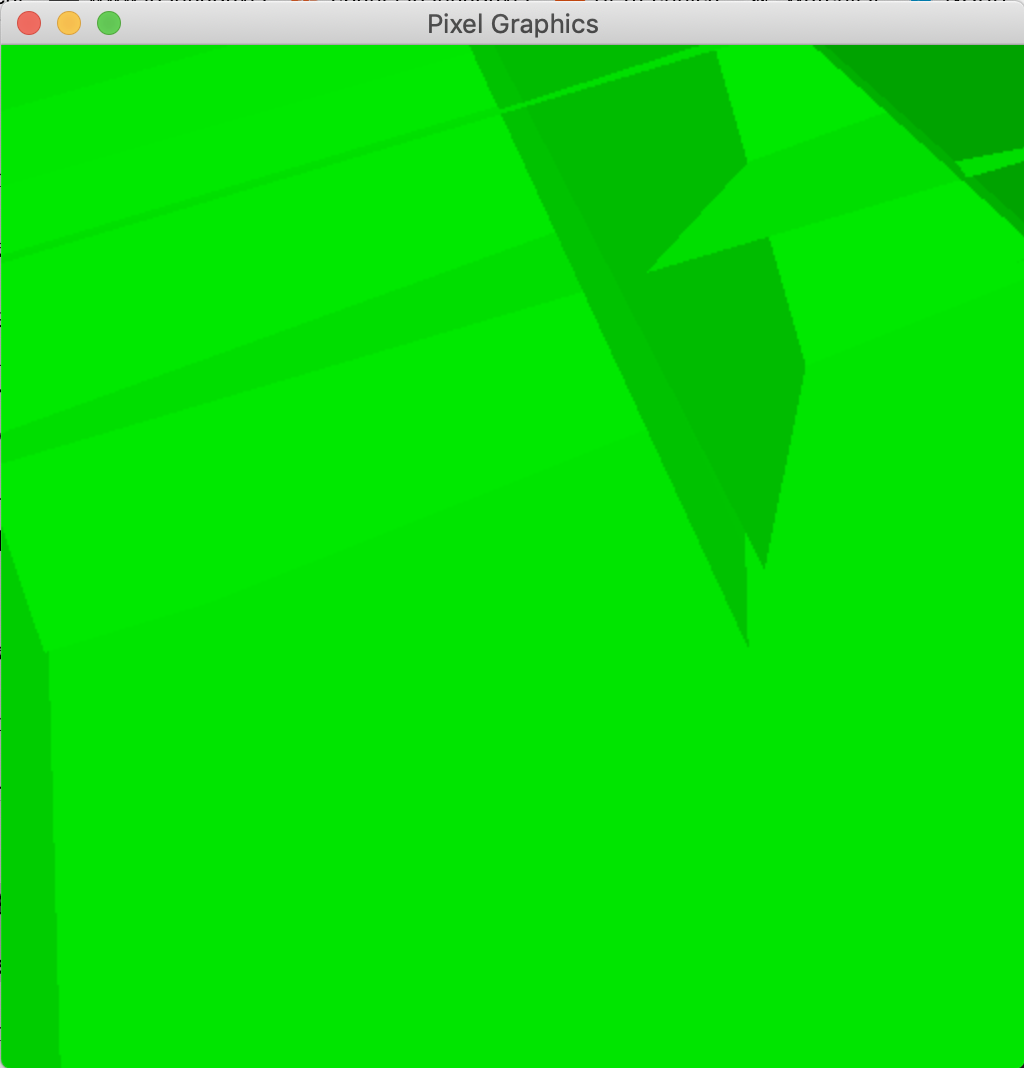
120main3D.c: Alter the name of the image file, but make no other alterations. Study. The program should display a rotating 3D box as in the screenshot below. If not, fix your other files. (I made this file by starting from 100mainHomogeneous.c and making many small edits, as described in class.)
Clean up and hand in 120main3D.c and its dependencies.
Today we add depth buffering to our graphics engine. Unfortunately, this feature requires edits to many files. Roughly speaking, my instructions work from the deepest part of the code (the shaders) up to the shallowest part (the main function).
130depth.c: Skim.
130mainDepth.c: Start with a copy of 120main3D.c. Enlarge your varyings so that they convey Z immediately after X and Y. Update the shading struct's varyDim and the transformVertex function accordingly. Update colorPixel to have the following interface. The function outputs not just an RGB color but also a depth. At this point in the course, the depth should be the negation of the varying Z coordinate.
void colorPixel(int unifDim, const double unif[], int texNum,
		const texTexture *tex[], int varyDim, const double vary[],
		double rgbd[4])
130shading.c: Update the colorPixel member's type to match that function's new interface.
130triangle.c: Here's the interesting part. The new interface for triRender is shown below. Deep in its algorithm, it receives an RGBD value from colorPixel. Use it.
void triRender(const shaShading *sha, depthBuffer *buf, const double unif[],
		const texTexture *tex[], const double a[], const double b[],
		const double c[])
130mesh.c: Because triRender is called from meshRender, and triRender needs a depth buffer, we have to update meshRender as follows.
void meshRender(const meshMesh *mesh, depthBuffer *buf, const shaShading *sha,
		const double unif[], const texTexture *tex[])
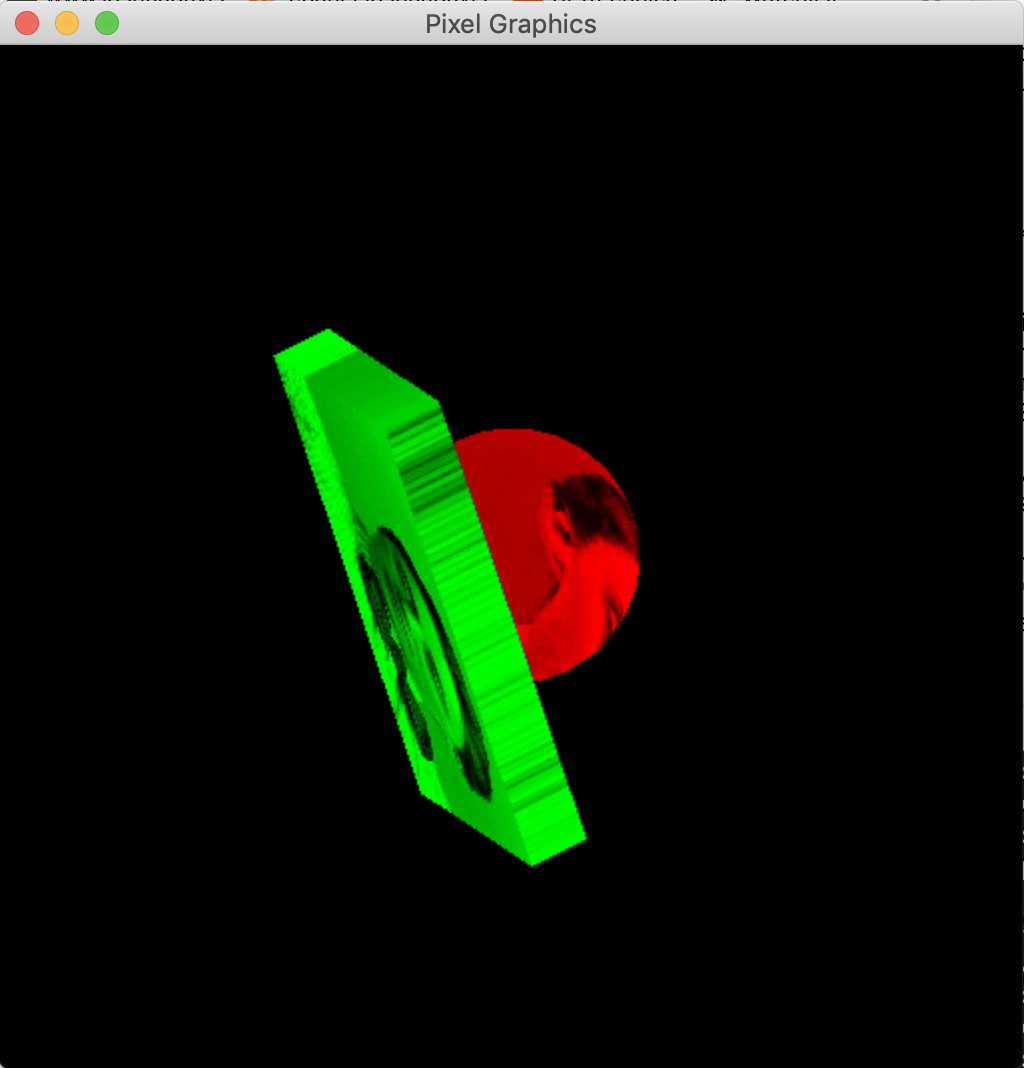
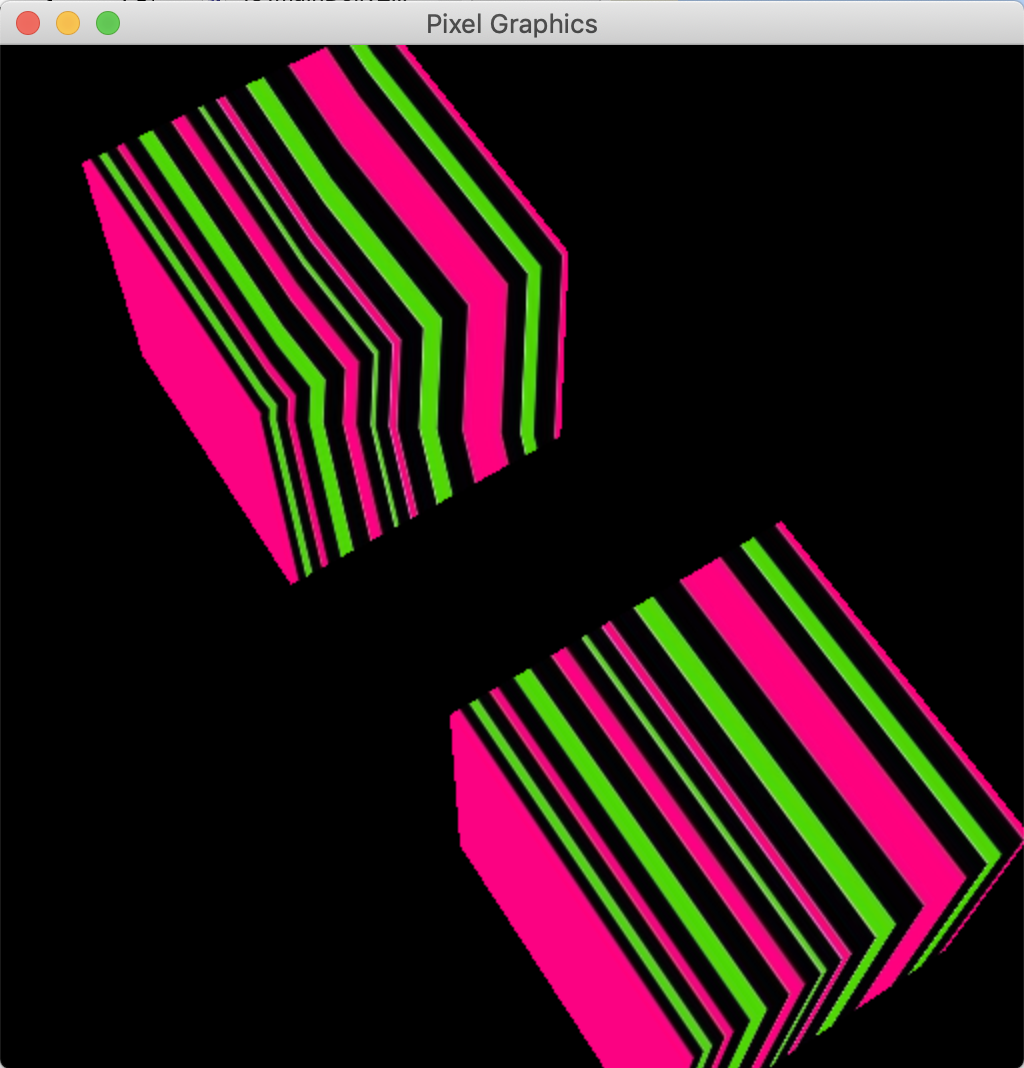
130mainDepth.c: In the appropriate places, declare, initialize, and destroy a depth buffer. On each animation frame, around the time that you clear the RGB buffer, also clear the depth buffer. Use the new meshRender. Also make various other required changes. I recommend that you inspect every line of code in this file. Test your program. The easiest way to make a strong test is to use two meshes that intersect. Here's mine:
130triangle.c: This question has nothing to do with depth buffering. What happens if a triangle crosses the boundary of the window, so that some of its pixels are outside the window? Well, pixSetRGB ignores requests to paint those pixels, so your image is unharmed. But your rasterizer still wastes time trying to paint them. For the first time in the course, you can now optimize-out this wasted time. How? Do it.
130mainDepth.c: Test again. You should get exactly the same output as you did before. Also test your optimization using a spatially large mesh, whose triangles try to cross the window boundaries. (In my test, the optimization quintupled my frame rate. Your results may vary.)
Clean up and hand in 130mainDepth.c and its dependencies.
Because of the exam on Day 11, I do not assign any homework today. Instead, that homework is assigned on Day 11. (So feel free to start on the Day 11 homework, if you like. You know everything that you need to know.)
The exam is on paper, in class. No computers, notes, or other aids are allowed. The exam covers all material up to and including the depth test. My intent is to test your knowledge of graphics, not your knowledge of C or linear algebra (although C and linear algebra might help you answer graphics questions).
As you study, it is a good idea to attempt Exam A from two years ago. However, bear in mind that the organization and timing of the course was somewhat different then, so not all questions are appropriate for us. Here are some additional study questions.
In this assignment we implement camera positioning, orthographic projection, and the viewport transformation. These changes make the relationship between world space and screen space more flexible, so that the users of our software can think about the 3D world that they want to build instead of the screen on which it is displayed.
140matrix.c: Implement the following functions. The second one is easy. The first one could be done by transposing and then multiplying, but try to make it faster than that. Mine is exactly as fast as mat331Multiply.
/* Multiplies the transpose of the 3x3 matrix m by the 3x1 matrix v. To
clarify, in math notation it computes M^T v. The output CANNOT safely alias the
input. */
void mat331TransposeMultiply(const double m[3][3], const double v[3],
		double mTTimesV[3])

/* Sets its argument to the 4x4 zero matrix (which consists entirely of 0s). */
void mat44Zero(double m[4][4])
140isometry.c: Study. As the course proceeds, isometries become increasingly important to us. So they're worth turning into a "class", like meshes and textures already are. That's what this file does. There are two un-implemented "methods". Implement them.
140mainCamera.c: Start with a copy of 130mainDepth.c, so that non-trivial scene objects are being rendered. In the main function, write non-trivial tests for the two isometry methods that you just implemented, to verify that they are working.
140camera.c: Study. This file defines a camera class (with a "has-a" relationship to the isometry class). Two of its methods are not yet implemented. We implement them later in this assignment.
140mainCamera.c: Delete the method tests that you just made. Declare a global camera variable. Right now we focus on its isometry; don't worry about its projection. Add a 4x4 matrix of uniforms to hold a homogeneous transformation for the camera. In some user interface handler, use camLookAt to revolve the camera around the scene objects. For example, you could revolve the camera continually in the time step handler or discretely in response to the user's pressing keys. The camLookAt function updates the camera's isometry; you then put the inverse of that isometry into the camera's 4x4 uniform matrix. In transformVertex, apply this transformation after the modeling isometry. Test. (In my version of this program, the scene objects appear in the lower-left corner of the window. That's reasonable and not any kind of error. Why?)
000matrices4By4More.pdf: Study.
140matrix.c: Implement the following functions.
/* Builds a 4x4 matrix for a viewport with lower left (0, 0) and upper right
(width, height). This matrix maps a projected viewing volume
[-1, 1] x [-1, 1] x [-1, 1] to screen [0, w] x [0, h] x [0, 1] (each interval
in that order). */
void mat44Viewport(double width, double height, double view[4][4])

/* Inverse to mat44Viewport. */
void mat44InverseViewport(double width, double height, double view[4][4])
140camera.c: Implement the two un-implemented methods. In the latter, assume for now that the camera is always in orthographic mode. (We remove this assumption in the next assignment.)
140mainViewport.c: Choose your own adventure:
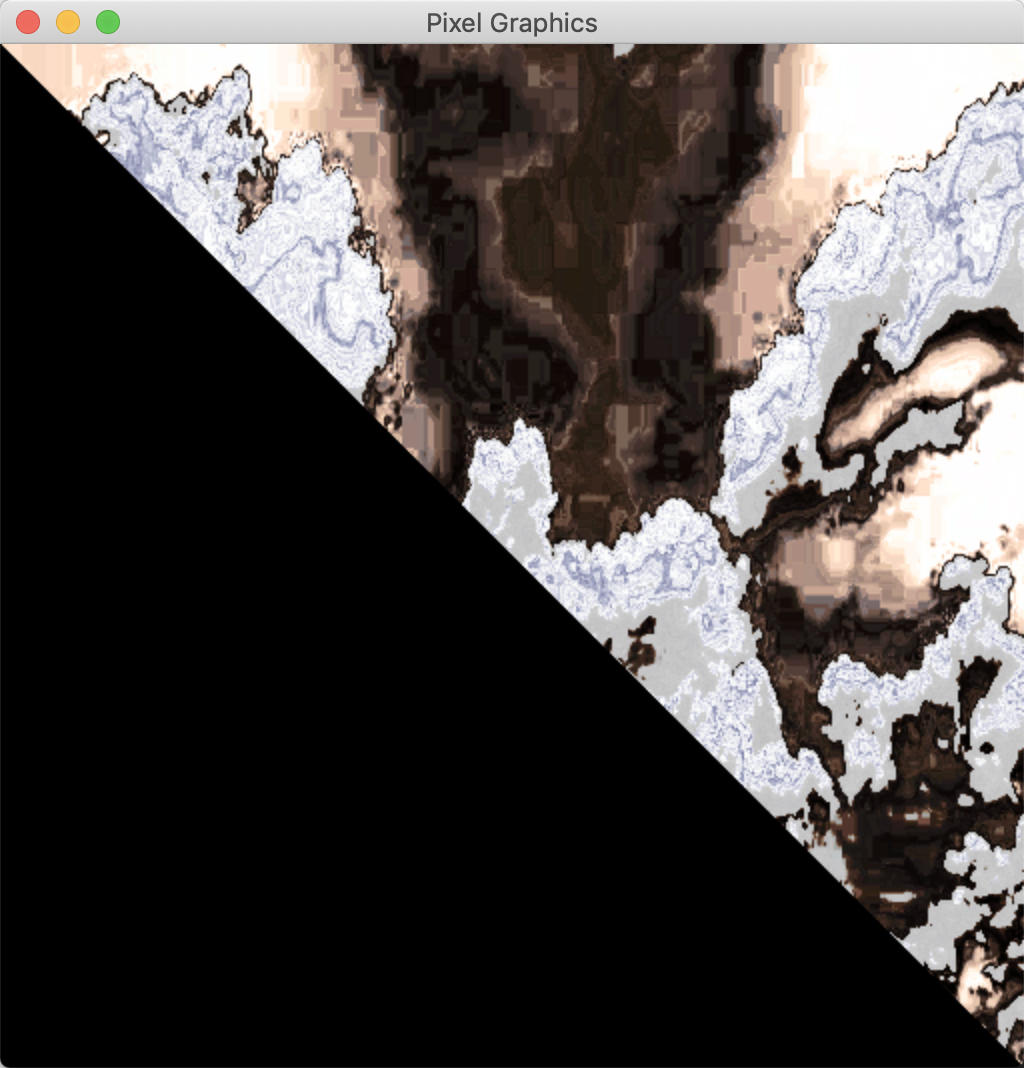
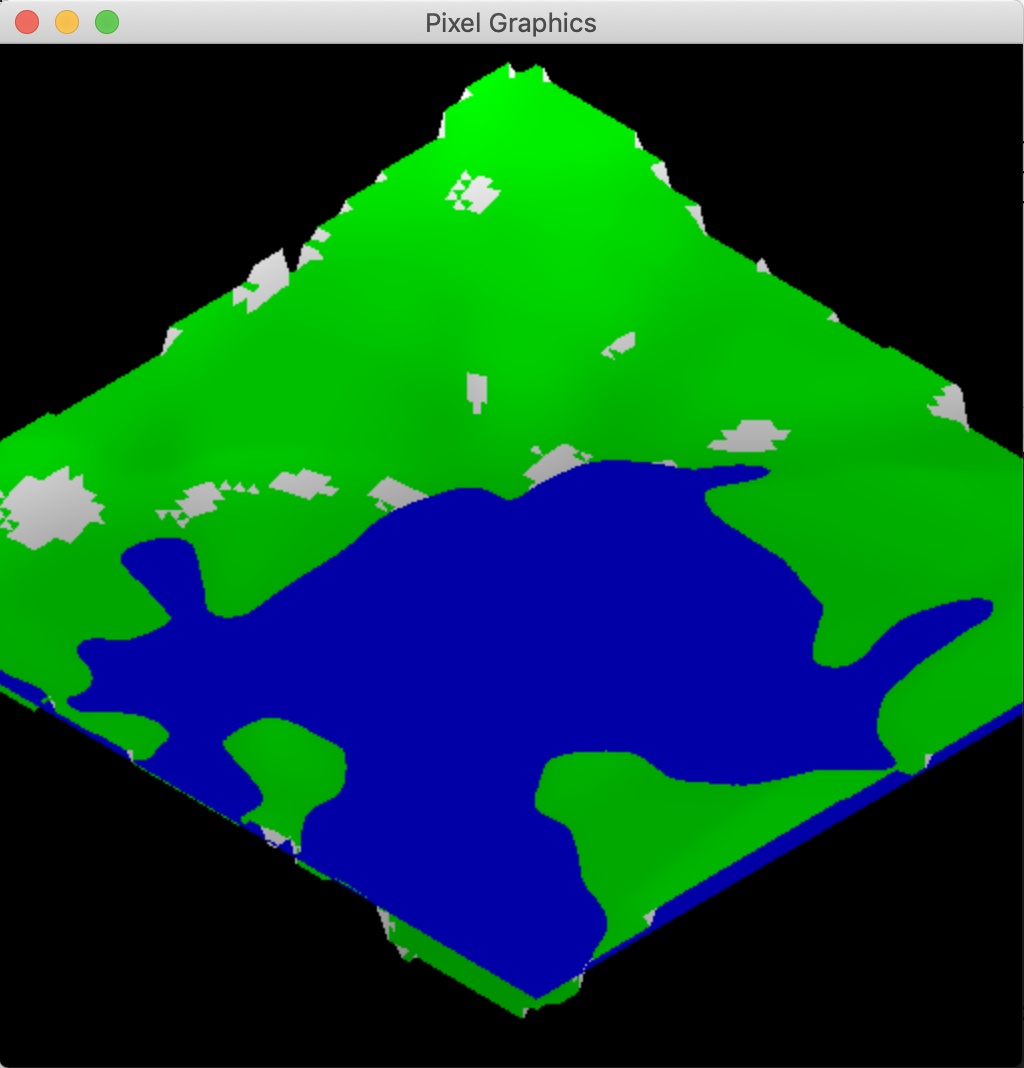
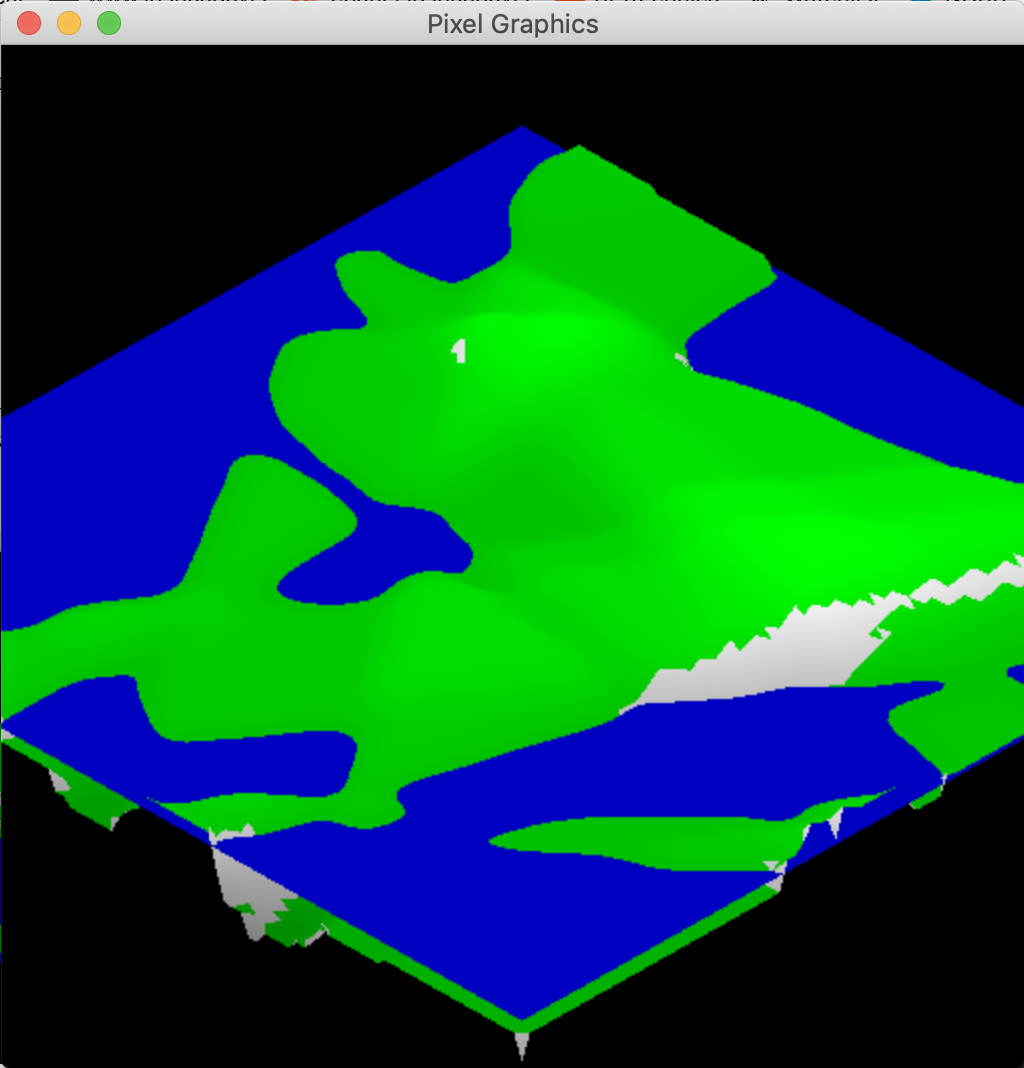
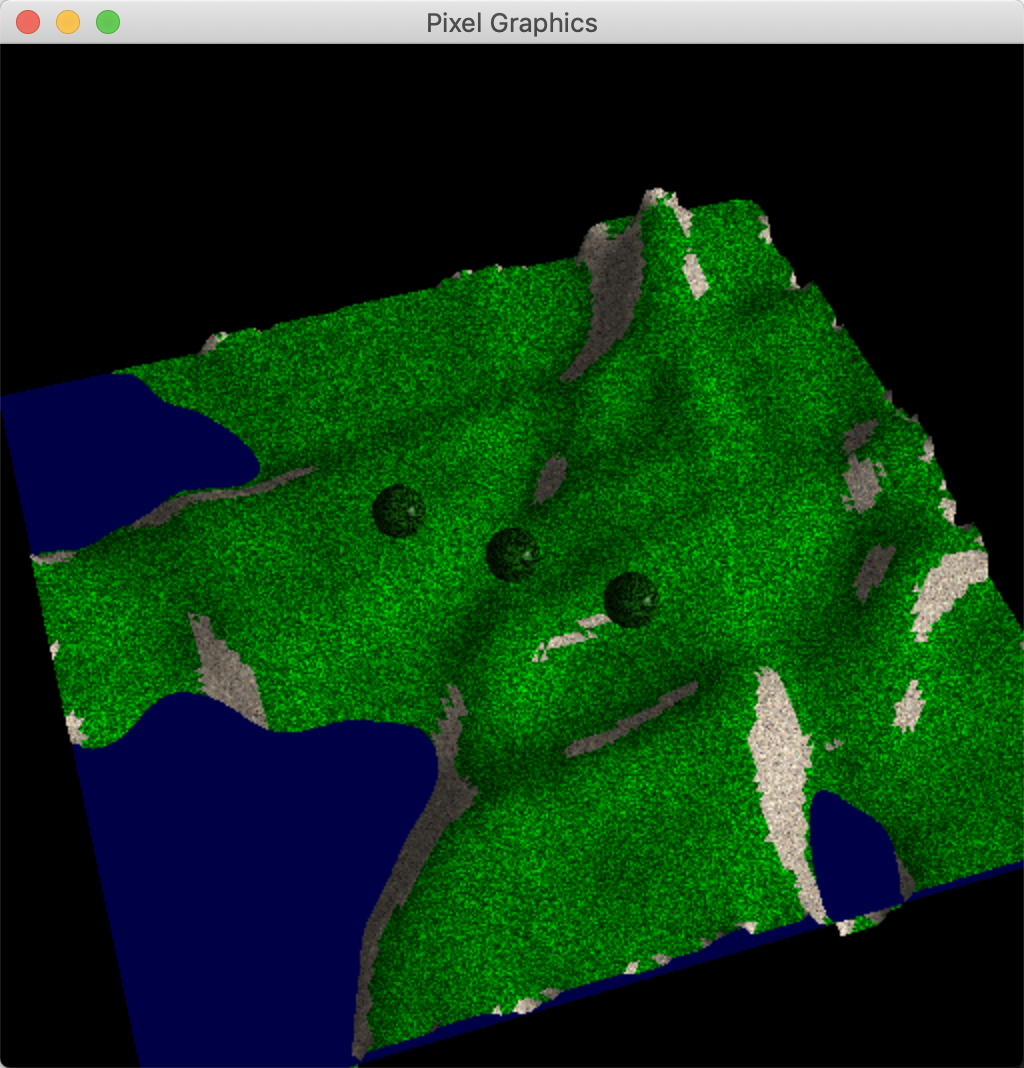
140mainLandscape.c, 140landscape.c: Do not alter this file at all. Study. This is another test program. It randomly generates a landscape comprising grass, rocks, and water — about 20,000 triangles total. (If this is too much for your engine to render quickly, then figure out how to downsize.) The minimalist fragment shader uses no textures. Read the keyboard handler to see which controls are available, including J and U for changing the water level. Here are screenshots from two runs of the program:
Clean up and hand in 140mainCamera, 140mainViewport.c, 140mainLandscape.c, and all of their dependencies.
Now we implement perspective projection. It's pretty simple, except that it forces us to implement near-plane clipping, which is not simple. Even more than usual, we build up the code through small changes and frequent testing.
150camera.c: Implement the following functions. Also, alter camGetProjectionInverseIsometry so that it works whether the camera's projection type is orthographic or perspective.
/* Builds a 4x4 matrix representing perspective projection. The viewing frustum
is contained between the near and far planes, with 0 > near > far. On the near
plane, the frustum is the rectangle R = [left, right] x [bottom, top]. On the
far plane, the frustum is the rectangle (far / near) * R. Maps the viewing
volume to [-1, 1] x [-1, 1] x [-1, 1], with far going to 1 and near going to
-1. */
void camGetPerspective(const camCamera *cam, double proj[4][4])

/* Inverse to the matrix produced by camGetPerspective. */
void camGetInversePerspective(const camCamera *cam, double proj[4][4])
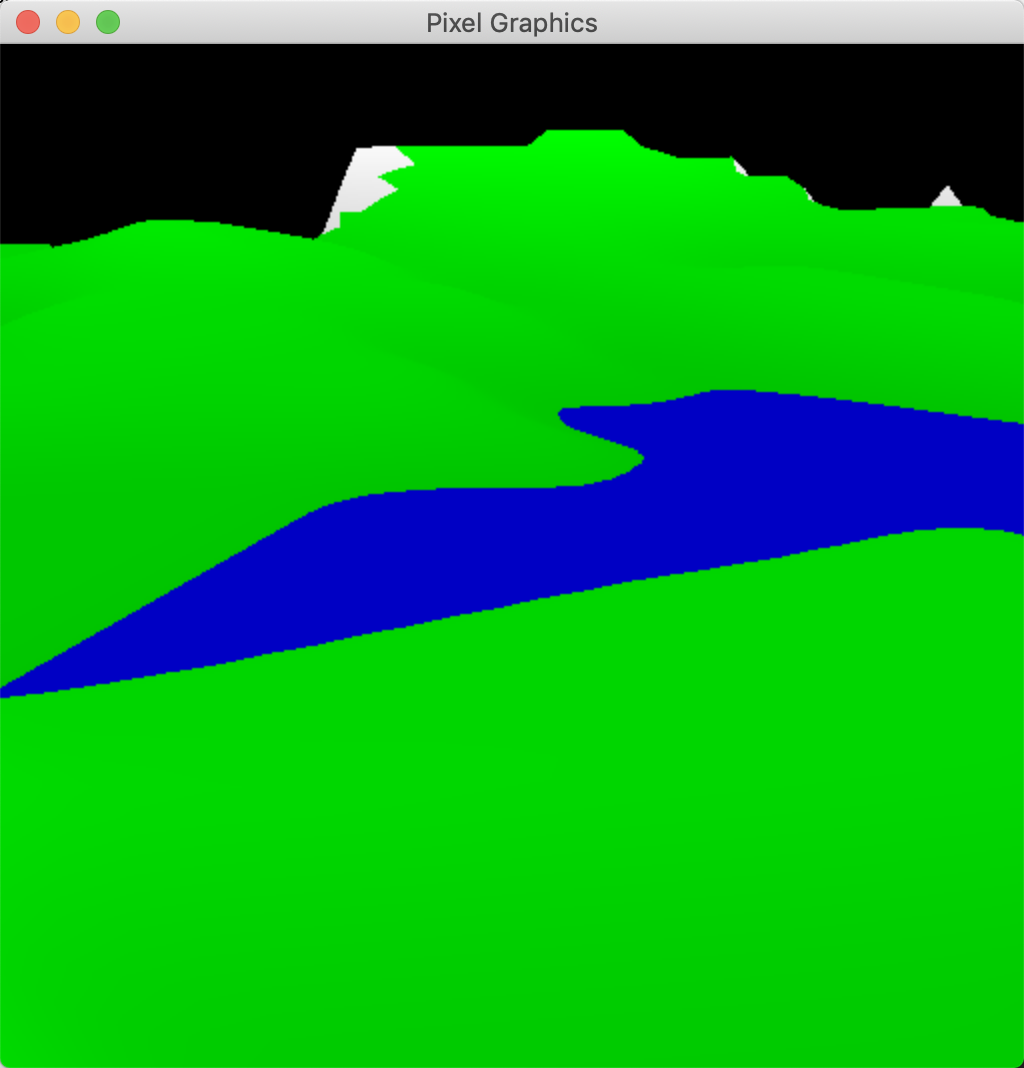
150mainPerspective.c: Start from a copy of 140mainLandscape.c or 140mainViewport.c. In the vertex shader, insert the homogeneous division after the viewport transformation. Add a keyboard control that uses camSetFrustum to switch between comparable orthogonal and perspective projections. Test. Your program should work perfectly when all scene objects are in front of the camera. On the other hand, undesirable artifacts (or even crashes) should arise when objects are at or behind the camera plane. Capture a screenshot of such artifacts. For example, the first image below is fine, but when I push the camera slightly forward I get the second image, which is terribly wrong.
150mainPerspective.c: Enlarge the varyings so that they start with XYZW, not just XYZ. The vertex shader should pass all four homogeneous coordinates through the varyings, even though W is always 1 (at this point of the work). Test. The program should produce the same output as it did before this change.
150mesh.c: Perform the homogeneous division here, just after the vertex shader computes the varying vector.
150mainPerspective.c: Remove the homogeneous division from the vertex shader. Test. The program should produce the same output.
150mesh.c: Perform the viewport transformation here, either just before or just after the homogeneous division. So that it has access to the viewport, meshRender now has this interface:
void meshRender(const meshMesh *mesh, depthBuffer *buf,
		const double viewport[4][4], const shaShading *sha,
		const double unif[], const texTexture *tex[])
150mainPerspective.c: Remove the viewport from the uniforms. Instead, pass the viewport into meshRender. Test. The program should produce the same output.
150mesh.c: This is the interesting part. Implement the near-plane clipping algorithm discussed in class. Here is the short version. It happens in normalized device coordinates — that is, after projection and before viewport or homogeneous division. A vertex XYZW is clipped if either W ≤ 0 or W < -Z. If all three vertices in a triangle are clipped, then the entire triangle is clipped. If two vertices are clipped, then the triangle is clipped to a smaller triangle. If one vertex is clipped, then the triangle is clipped to two smaller triangles. If no vertices are clipped, then the triangle is not clipped at all. The vertices of the smaller triangles are found by linear interpolation. More specifically, suppose that vertex a is clipped and vertex b is not. Then a + t (b - a) is where the near plane intersects the triangle side from a to b, with t = (a2 + a3) / (a2 + a3 - b2 - b3). This interpolation applies to not just the XYZW coordinates but rather the entire varying vector.
150mainPerspective.c: Test again. There should be no artifacts or crashes when objects cross the camera plane. Instead, they should appear clipped where they cross the near plane. Both perspective and orthographic projections should work.
Clean up and hand in your artifact screenshots, 150mainPerspective.c, and all of the files on which it depends.
Today's homework is short, in the hopes that we can synchronize the students, the class discussions, and the homework.
160mesh.c: Implement perspective-corrected interpolation as we discussed in class. Formerly you performed the homogeneous division on components 0, 1, 2, 3 of the varying vector. Now you perform it on the entire varying vector except for component 3. Component 3 inverts from W to its reciprocal 1 / W.
160mainInterpolating.c: Make a demo program that uses at least one texture. In the fragment shader, divide the texture coordinates by the interpolated 1 / W, to cancel out the effect of dividing them by W in the mesh renderer. Test. Your textures should not suffer from the bending problem, which is illustrated in the top of the following screenshot.
Congratulations! Our software 3D graphics engine is complete. In the coming days, we continue to add features to our software, but these features don't require any edits to the engine itself.
Let's take this opportunity to package our engine for posterity. This packaging has several benefits. First, we can release a binary version of our engine (170engine.o below) without giving away the source code. Second, we can hide the implementation of the engine from its users, so that they use only the interfaces. Third, those users will not have to re-compile the engine every time they compile their programs. (In a small project like this, the compilation time is small. In larger projects, the time can be huge.) Fourth, the users will have to include just one engine header file instead of 10 engine files.
170engine.h: Skim. This header file specifies public interfaces without committing to any details about implementation. For example, my 130triangle.c contains several helper functions for triRender, but they do not appear in this header file, because they are not intended for public use.
170engine.c: Compile into 170engine.o following the directions at the top of the file.
170mainEngine.c: Start with a recent demo program such as 160mainInterpolating.c. Instead of including all of our engine's C files, just include 170engine.h. Compile by mimicking the instructions near the top of 170engine.c — that is, by mentioning 170engine.o on the command line, just like 000pixel.o. Then test. The program should work exactly as it did before this change.
170mainEngine.c: In your main function, insert code that makes a box mesh, makes a sphere mesh of radius 1, and saves those meshes to files. After running the program, inspect the files. At each vertex, the last three attributes, NOP, form an outward-pointing normal vector — that is, a unit vector that is perpendicular to the mesh. In comments near the top of the file, answer these questions:
Clean up and hand in 170mainEngine.c, 170engine.c, 170engine.h, and all C files mentioned in 170engine.c — that is, your entire graphics engine.
In this assignment we implement basic diffuse and specular reflection. We assume, for now, that the light is directional and the camera is directional/orthographic. All of the calculations are performed in world coordinates.
180mainDiffuse.c: Start with a program that makes a fairly rich scene such as a landscape. If it doesn't already use at least one texture, then make it do so. To help you assess the lighting effects, the texture should have interesting color variation (for example, not just stripes of two colors). Add uniforms for the light direction dlight and the light color clight. Add varyings for the surface normal dnormal. In the vertex shader, rotate, but don't translate, the normal. In the fragment shader, implement Lambertian diffuse reflection. You need to design the diffuse surface color cdiffuse somehow — probably involving the texture. In the rest of 180mainDiffuse.c, carry out the necessary configuration. Test.
190mainSpecular.c: Start with a copy of 180mainDiffuse.c. Add uniforms for the camera direction dcamera. In the fragment shader, add Phong specular reflection to the diffuse reflection. You need to design the specular surface color cspecular and the shininess somehow. I made uniforms for them. Configure and test, particularly with an orthographic camera.
200mainAmbient.c: Start with a copy of 190mainSpecular.c. In the fragment shader, incorporate some kind of ambient contribution. Configure and test. Here's a screenshot of mine:
Clean up and hand in 200mainAmbient.c and any art files (textures, meshes) that it requires.
If you haven't already done so, complete the Day 14 homework. Today we implement positional lights and cameras. Optionally we add some other, less-important features.
210mainPositional.c: Change the uniform directions dlight, dcamera to positions plight, pcamera. Add varyings for the world coordinates pfragment of the fragment. In the vertex shader, write the varying (that will become, after interpolation) pfragment. In the fragment shader, use pfragment, plight, pcamera to make dlight, dcamera. Don't forget to handle the fact that pfragment has been interpolated in a perspective-corrected way. Configure and test, particularly with a perspective camera.
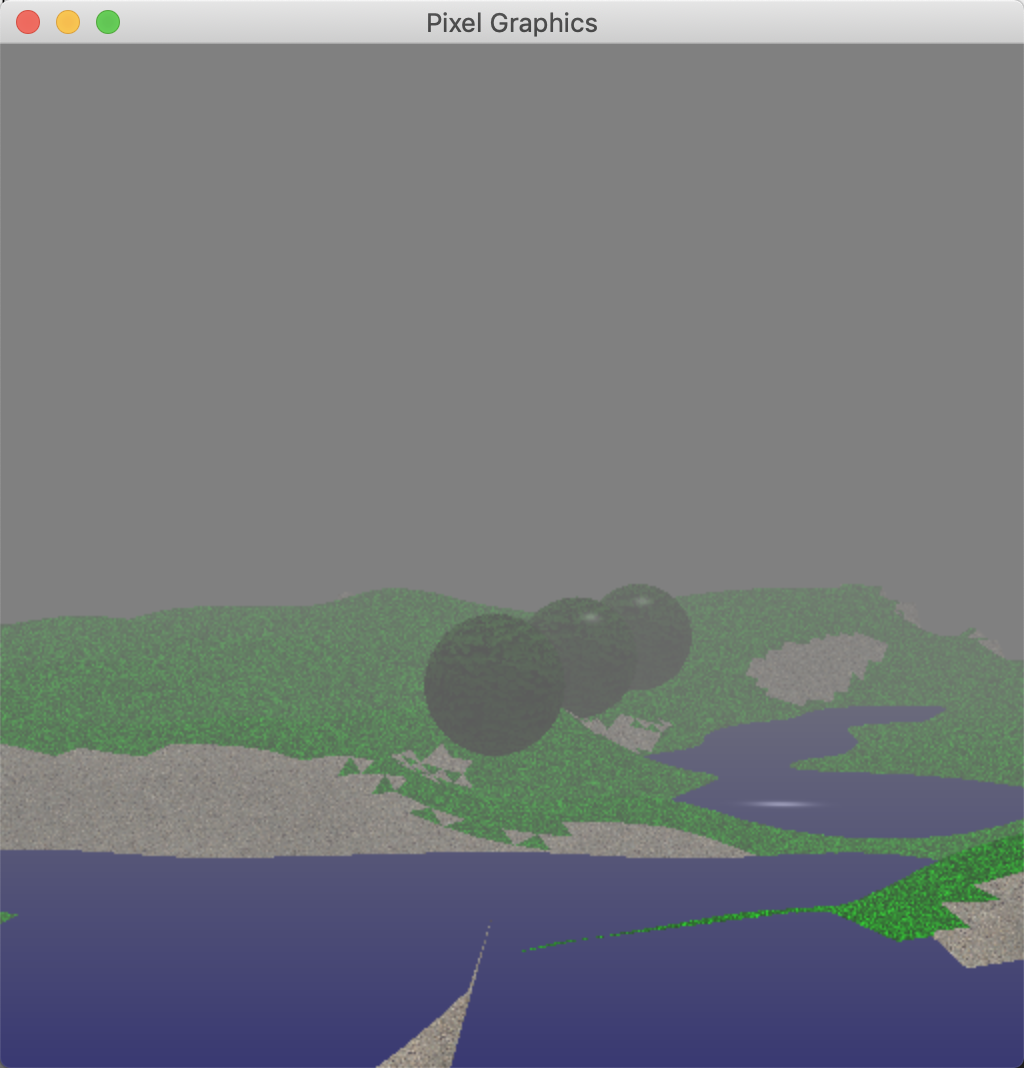
220mainFog.c: This exercise is optional. Implement a fog effect. There are a few ingredients. First, on each frame clear the framebuffer to the fog color rather than black. Second, make the viewing volume not gigantic. Using camSetOneProjection after camSetFrustum, you can manually set the far plane so that it isn't far beyond the focal plane. Third, in the fragment shader, linearly interpolate so that at the near plane you get the same color as in 210mainPosition.c and at the far plane you get the fog color. Here's a screenshot of mine:
230mainAttenuation.c: This exercise is optional. We haven't even discussed the idea in class, but you might still enjoy it. The idea is that a positional light shines intensely on objects near it and more weakly on objects far away. More precisely, the intensity of light decreases (or attenuates) according to a certain quadratic relationship. So start with a copy of 210mainPositional.c. Add three uniforms which I'll denote att0, att1, att2. In the fragment shader, compute the world distance d from the fragment to the light. Divide the light's diffuse and specular contributions by
att0 + att1 d + att2 d2.
Play around with the values of att0, att1, att2 until your results look good.
240mainMultiple.c: This exercise is optional. Make a program with two light sources of different colors. Their diffuse and specular contributions add. There should still be one ambient contribution, not two.
Clean up and hand in 210mainPositional.c and any art files needed.